Friday, June 23, 2023

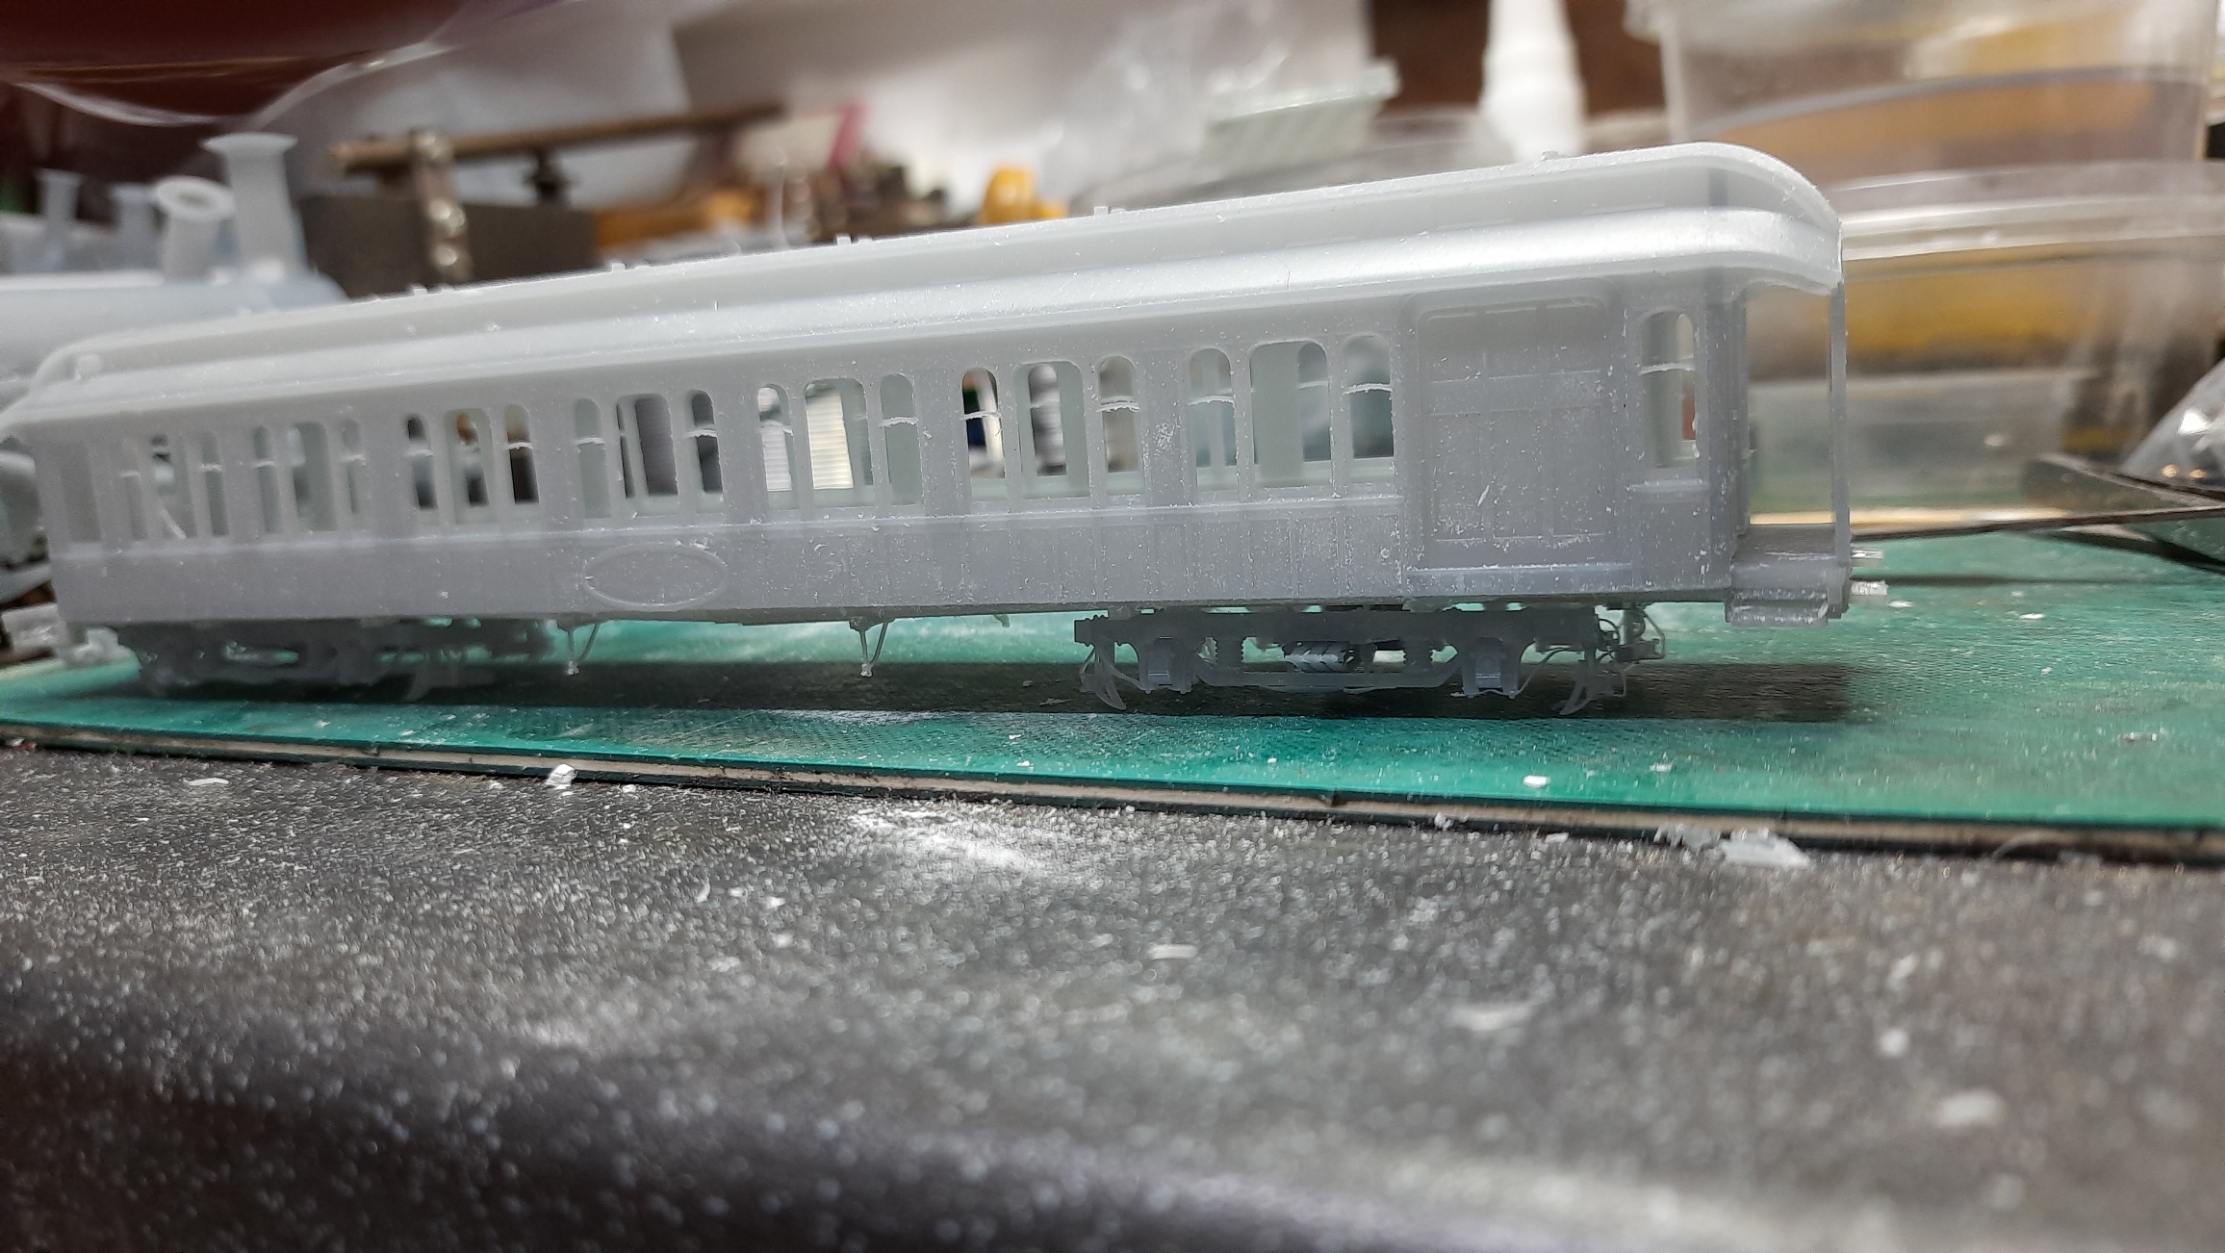
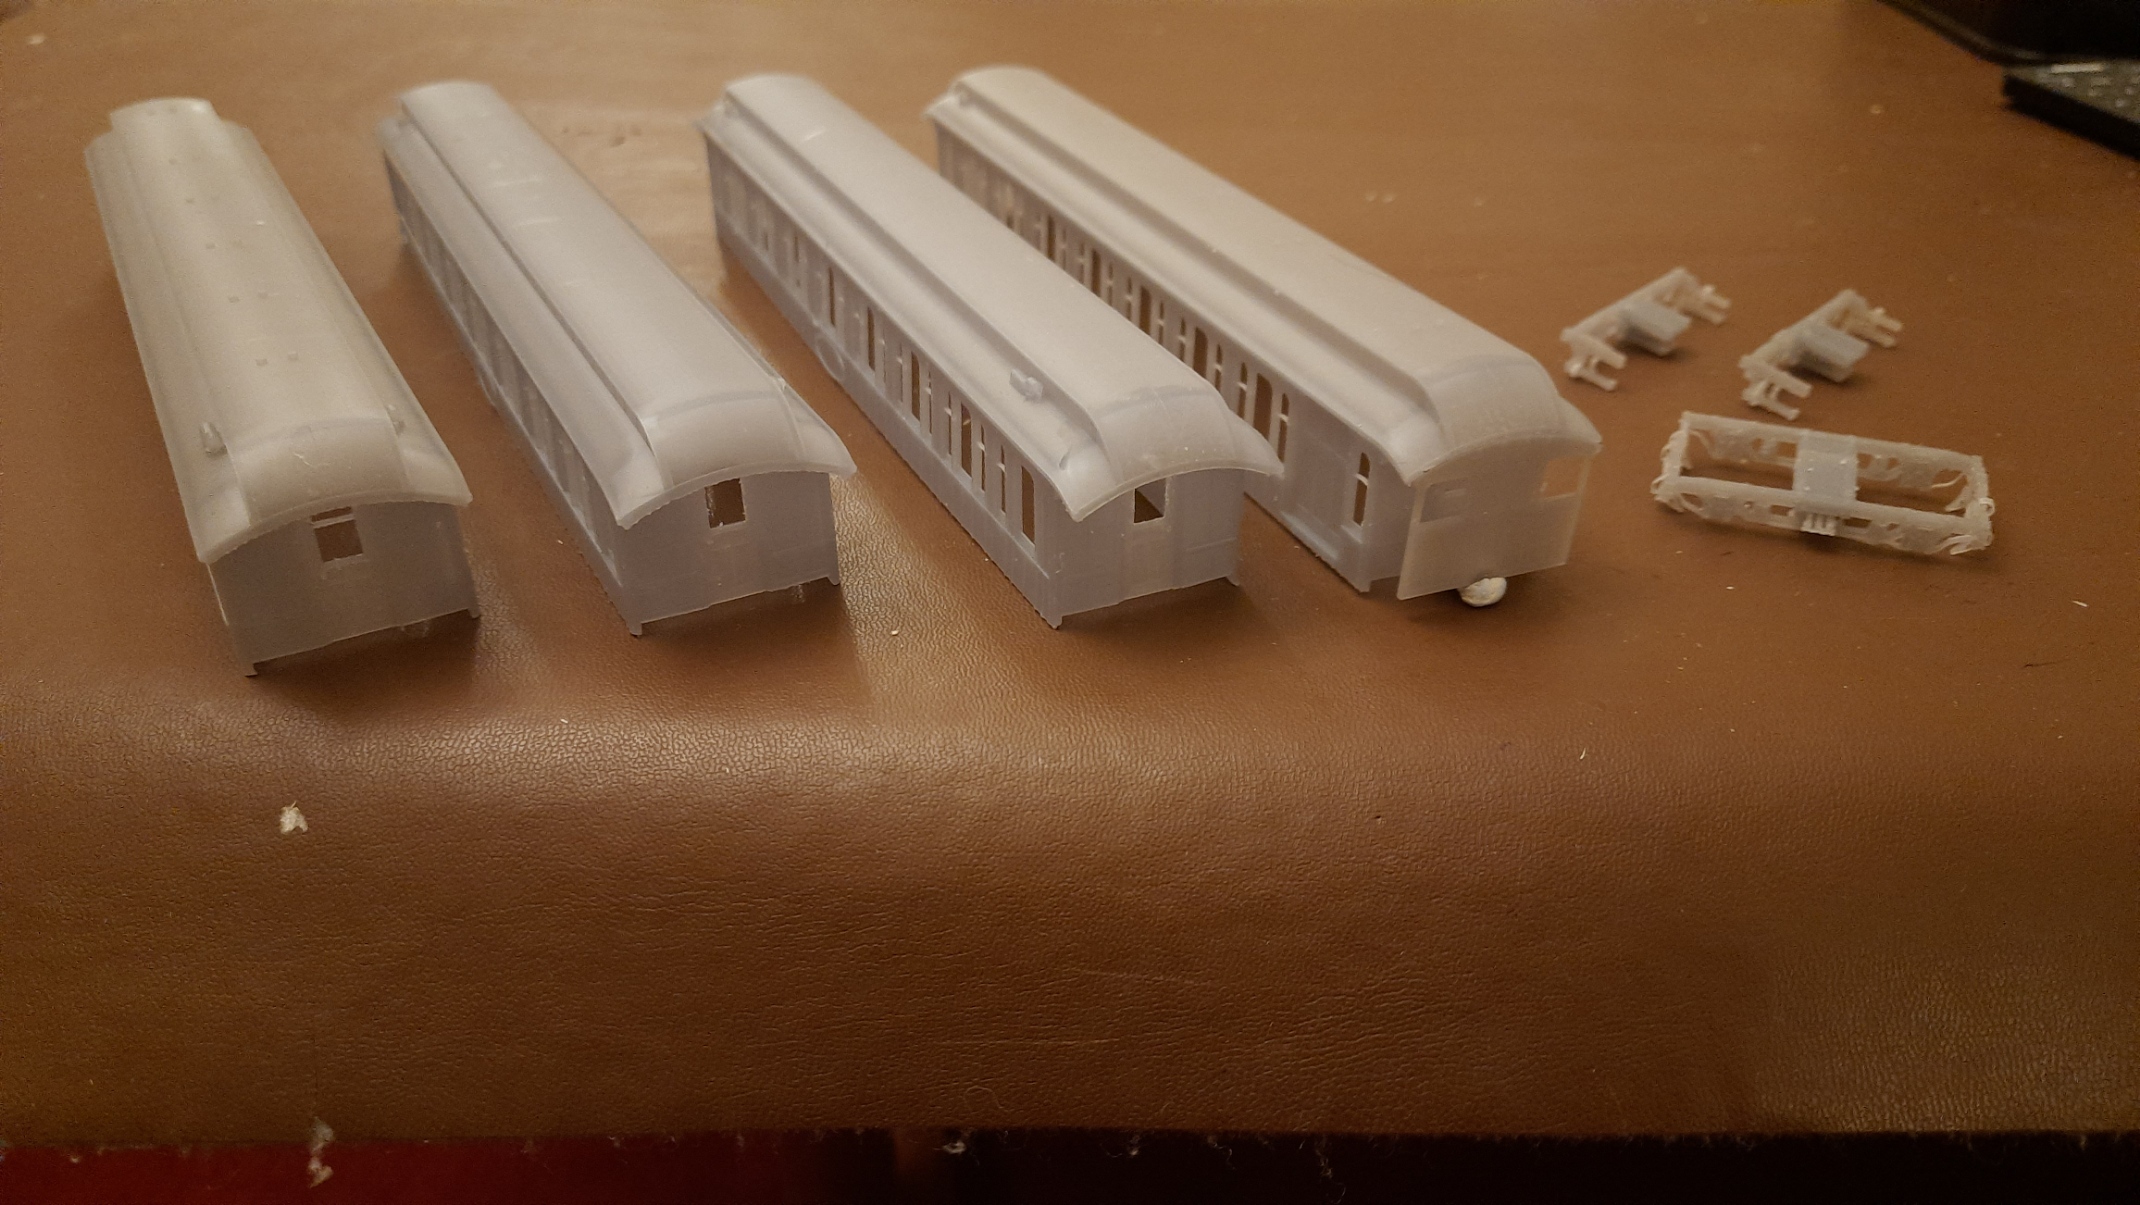
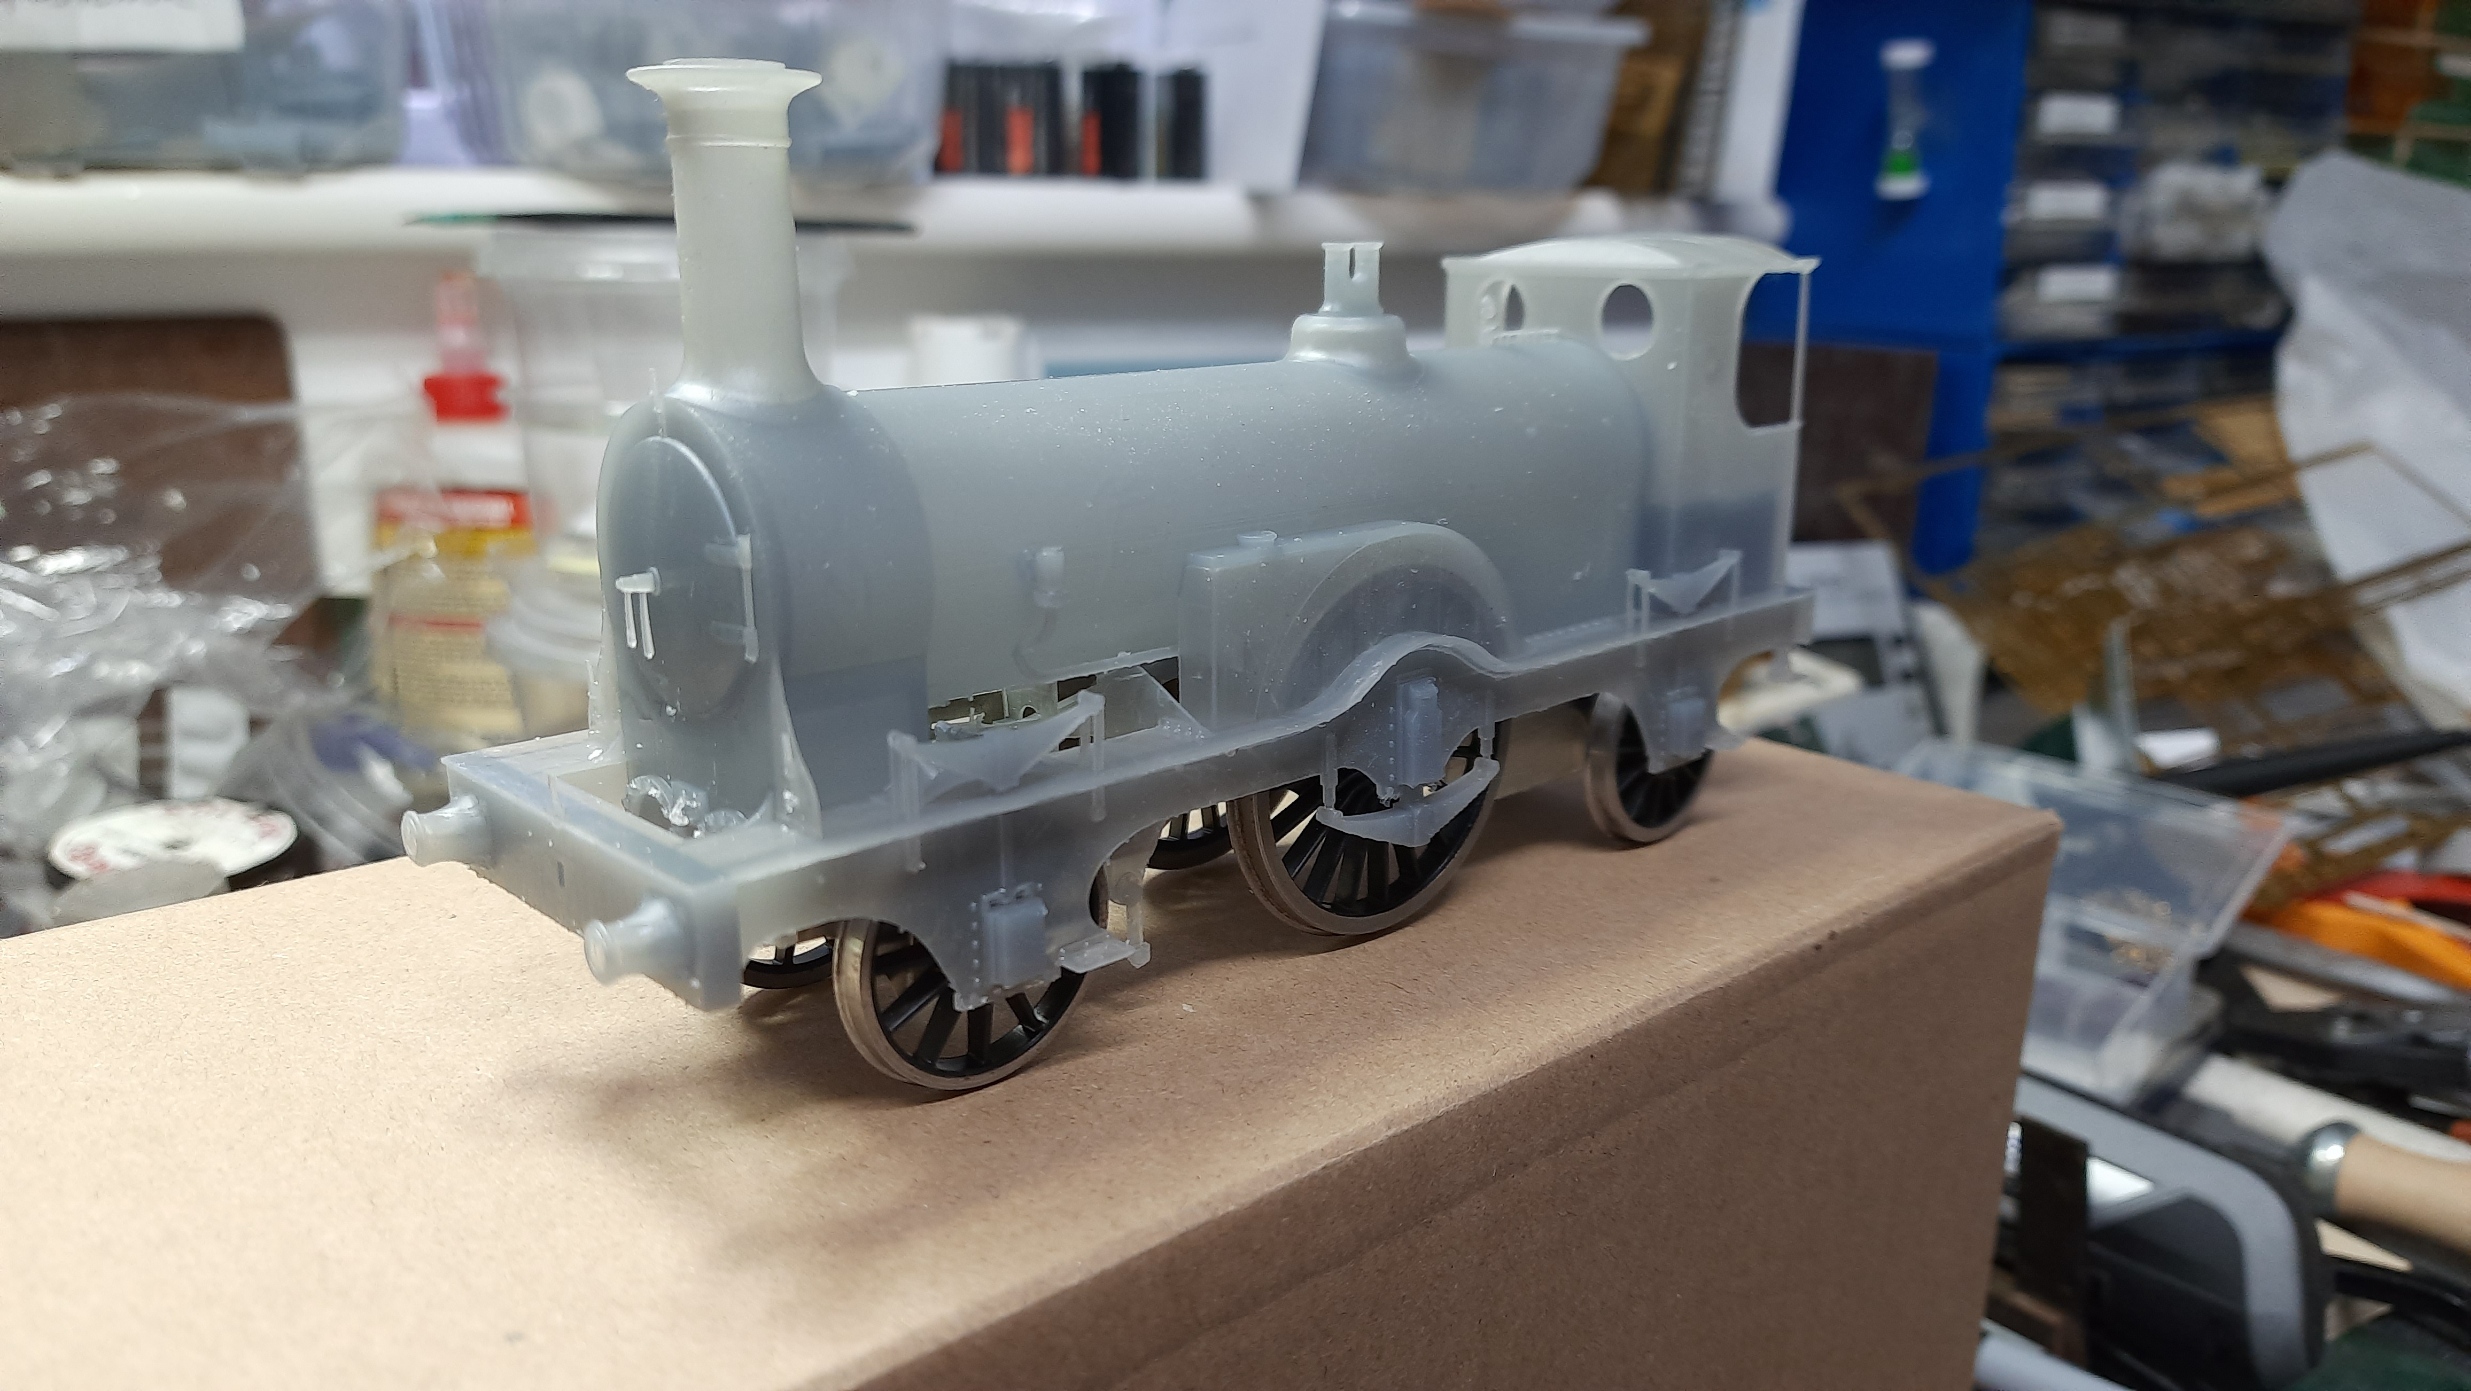
7mm mostly 3D printed loco and tender

 I have been fiddling around with many things to do with 7mm LB&SCR models and this is the latest. Not quite perfect but an etched chassis under both and a 3D printed body with separate parts. Looking promising so I shall carry on and see if I can get it finished in time for Stafford Gauge 0 Guild show in September, along with many other things!


Monday, April 17, 2023

7mm scale 1881 train, first trial prints


 A first go at trialling this in 7mm scale. Looking promising but quite a bit still to do.


Friday, March 17, 2023

Interior fitments completed!

 Looking at all the separate parts, I thought I could incorporate the louvred screens into the end lockers so have done so, and drew up the Faure accumulators and the partitions separating the luggage and the servants from the 'toffs'!


The source material for the designs came from these two sheets, the ILN sketches show the servings area as well as suggesting that the luggage windows may be frosted? Certainly the top lights had an etched design on them so I will attempt to do that and print white on the OHP acetate as shown below somewhere.


Just printing another version of the bogies out to see if I have sorted the bowing strip around the bottom and then I will start printing in 7mm scale. Hope you like it! Cheers, Ian

Thursday, March 16, 2023

Starting the luxurious interiors


 Almost all the parts designed and printed and just placed on the underframe/floor units to double check sizes and quantities. A few more bits to go yet!


This is looking at either set of ends showing the beefed up railings on the balconies, the buffers and steps (fitted on wires) at the luggage end; some of the panelled entrance way areas hiding the toilets and stove, the louvred panels to fit behind the toilet and stove windows and the buffet.


The swivel chairs don't stand up on their own at present as they are back heavy. They are correctly proportioned at present so I think I will leave them as is but they will have to be glued strongly to the floor unit. 

As you can probably see, I have designed and printed the floor/underframe unit as half length. This allows me to print them on a smaller printer whilst the bodies are printed on the larger printer. 

I can see now what else is required to be designed and printed before these can be offered to others. I will update as and when. Cheers, Ian


Friday, March 10, 2023

First try at the underframe.


 This is a first go at the underframe in 4mm. Printed in two halves straight on the build plate. I have had to file off a load of the 'elephants foot' and have created a lot of dust , as you can see! Everything just placed together. Looks like the bufferbeam will be a separate fitting as that and the buffer bodies haven't printed at all well; and the handrails are too thin for the open end so they need redrawing a bit thicker.

I do think it is starting to look like a model of the real car so I'll carry on and see where I get to in the next few days!

Wednesday, March 08, 2023

5th December 1881 Pullman Limited

 Maud, Victoria, Beatrice and Louise.


Hot off the 3D printer are the one piece body parts for the 4mm scale 1881 Pullman Limited. Also a first try at the 8' bogie.

The end panel of the outer two cars is just positioned with bluetac at present. I need to beef up a couple of areas of the bogie.


The bogie has a thin strip from the corners to and between the bottom of the w-irons. This needs increasing in thickness so it will print properly. I may offer the bogies in slightly different configurations so they could be attached to a brass inner part for instance. 


There are basically two types of Pullman car here, the centre two and the outer two. The outer two have a luggage area at the extreme ends of the close couple set. 


This is the end luggage cars.


This is the centre cars.


Obviously, I still have to sort out the underframe/floor parts and the furniture within. 

I thought people might be interested to see the current status. 

Now to try some 7mm prints!

Sunday, February 26, 2023

Sussex also!

 I had forgotten the third variation which was the rebuild by Stroudley, named Sussex. I am making up a EB Models large Craven Tender to go with this as it appears spot on from photos I have seen. This is in its earliest condition prior to dome and westinghouse, among other changes.


The whistle was knocked as I was removing supports but otherwise all seems okay.

Cheers, Ian

Tuesday, February 21, 2023

Craven Locos


 First time on a modified EBModels Dieppe chassis and a modified Slaughter Goods Tender chassis. This is the 1864 Robert Stephenson single in original condition - well, as far as we know! I have used the GA as I haven't seen a photo of one in original condition. 

So, this will be coming to the EBModels range some time this year,

There is a Slaters SG29 motor and gearbox on the driving wheel. It all fitted.

Everything is printed as one piece, the chassis has been modified to stop at the front of the cylinders so the gap ahead of them is scale width. This is a first trial without any suspension/compensation yet. I can start working that all out now I know the initial ideas work. 

But while I had most of it drawn, it seemed sensible to do Dieppe herself. The body has been modified as per photos and also the tender now has different springs and toolboxes etc. I need to reprint with a couple more supports on the base of the clack valve and Westinghouse pump as they aren't correct here. But the pipework all worked for the pump! This is sitting on the same chassis as the Craven version above. 

I am awaiting new etches so I can sort out the brakes and other bits still missing. There are other 3D printed parts all ready but not yet shown.

I will also look at a version of Drayton & Portsmouth also with the different axlebox pattern front and rear and salter springs on the dome and not on the Firebox and a few other changes. .


As you can imagine, there is a lot still to sort out but I thought I should show where I am starting from. Hoping to have something a bit further on at the Spring meeting and will be looking at the 4mm version next.

 And I can get working on the 4mm version of 153, finalise the 7mm bits and the Slaughter Goods in 7mm needs to be restarted. 

Hope to be able to put some more up in a few weeks. Cheers, Ian 


Friday, December 09, 2022

Saloon Window etched edges and toilet 'glass'

 I have been experimenting with what I could print with the Ghost white toner in my laser printer for the last couple of years. I have been trying to get a transfer for the inside of saloon windows to simulate the frosting/etching of such asa shown in this photo..


I don't know why it took so long to think about printing on laser transparency film I used to use years ago for overhead projectors. I found some and tried printing some designs from 2018.


Very difficult to photograph! These are 7mm versions as I have a dia 21 on the go at the moment.
I shall do further experiments and print some for particular carriages and then make them available via E.B.Models.  Later on in 2023. Hopefully show the completed saloon first.
Cheers, Ian


Thursday, November 10, 2022

Thomas Potter masterpiece uses E B Models, 7mm etches, 3D printed parts, numberplates, lining and name transfers

 Thomas Potter published these pictures last week on Facebook. He has built the 7mm Grosvenor etches, used the 3D resin printed parts for the loco and tender then painted it and finished it off using EB Models numberplate, name and lining transfers.

Fantastic to see someone putting them all together! Many thanks for sharing.

Cheers, Ian


In the meantime, I am still experimenting with 3D printing and have recently printed this early Pullman. More in the next few months.


Saturday, December 04, 2021

Numberplates


Virtually all numberplates are available in 4mm and 7mm scales.  Correct style works plate included. £6 for 4mm £9 for 7mm includes postage to UK address.

Friday, November 26, 2021

3D parts for D1 in 7mm and 4mm scales

 Just started to put together an old 7mm Albion Models D1 tank and found I haven't got all the castings, so decided to draw and print my own. Also, as I now have a higher resolution printer, I printed them at 4mm scale as well as 7mm scale. I see I haven't included the 4mm springs but the rest are there.

Parts drawn are:

1. Motion drop in with early style pump. 2. Cab backhead, splashers and reversing gear. 3. Cab rear with brake, coal door, sandbox/toolbox, dampers. 4. Chimney. 5. Cylinder cover and angle plate. 6. Dome with safety valves. 7. Whistle. 8. tank top exhaust steam dome. 9. Clack valves. 10 Cab roof. 11. tank top water fillers. 12. Can/guard communicator. 13. Cab Steam/Brake pressure gauges. 14. Smokebox door and dart. 15. Lower firebox/ashpan sides, front and rear. 16. Sandbox filler caps. 17. Smokebox front cylinder screw lubricators. 18. Front wheel lubricator oil boxes. 19. Smokebox LHS and RHS lubricator/blower controls. 20. Brake blocks for leading and driving wheels. 21. Brake blocks for trailing wheel. 22. Westinghouse pump. 23. Leading wheel leaf springs. 24. Driving wheel volute springs. 25. Trailing wheel leaf springs.


4mm to left, 7mm to right.

I have just realised I didn't print the 4mm loco springs. 

I aim to produce a set for the E1 also as I have a couple of them to build as well.

Cheers, Ian


Wednesday, October 27, 2021

Can you tell what it is yet?


Just started to add all the rivets on the framing. More in a while!

Sunday, October 17, 2021

What I have been up to whilst battling with a nasty bout of Tinnitus - Craven 153 and Cudworth Goods

 Having had a few months of really awful racket in my head that really affected thought processes etc, I started a few weeks ago to manage a bit of time on the 3D graphics. It started with a half hour at a time and has gradually increased to about two hours before I just have to stop and do something completely different.

In March  showed the Slaughter Goods in 7mm, a trial etch and 3D resin printed parts. I am hoping to be able to start the trial etch assembly soon - Tinnitus really doesn't help here - so I realised in the meantime that the wheelbase was the same for some of the other 'Standard' Goods. One of which had a Cudworth coal burning firebox - eight foot long!!


This is a first go at a 4mm scale print, it works in 7mm also!
I have been looking at all the parts and thought this was probably too many and the split for the tender should be like the loco.
I have yet to adjust these drawings as I went on to the Craven single 153/4. This has now been drawn in Stroudley condition with lots of parts already on the body leaving the handrails and lamp irons to be added. 

This is the 4mm and 7mm scale versions. They are two part prints for the body in one piece and outside frames with footplate as the other, for both the loco and tender. 


I have to adjust the tender drawing to print the top piece curving down at the front as per the Cudworth Goods tender. The drawing is correct, there seems to be some error in the slicing file that I cannot resolve so am about to remove that bit and redraw it in a different way. I have split them so that the springs are with the footplate and lower part. The upper print has all the parts for the body apart from the reverser which would need to be glued on to the cab floor.
I still intend to get the Craven version to be available also.

This is the photo of the 7mm Craven version as I built it at the start of the pandemic. The smokebox is different, along with a few other things. I intend to print this in the same style but with provision for the face of the driving wheel splasher to be etched.

So, some thoughts from you all please. Should I continue with the 3D printed, almost everything as one piece but split in a way that suits painting OR would you prefer to have an etched kit with a few parts in the 3D resin as I have developed above?
The chassis would need to be etched, as per the 153 photo showing the two part prints. 

Cheers, Ian


Tuesday, March 23, 2021

4mm Inside Motion parts for Slaughter Goods

 I finally got the Slaughter Goods inside motion drawn in a way that they will print consistently. There are four parts; left hand (a) and right hand (b) slidebars, which have the ram pump on their outer side; the valves (c) in the centre with their eccentric rods and links and connection to the underside of the boiler; and the lifting links and weighshaft (d) and weight that attaches to the front of the motion plate. The lifting links on this loco attached to the top of the eccentrics quadrants.


This shows the four parts in roughly their correct orientation, the valve rods should be slightly lower and the eccentrics slightly higher.

These are b, c, d and a from the top.
You can, hopefully, see that the right hand crank drive is above the axle with the driveshaft towards the rear of the slidebars and the left hand crank drive is in front of the axle with the driveshaft nearer the front of the slidebars. The eccentrics are also in differing positions so the quadrants are slightly out of alignment when viewed from the side. The weighshaft has the bearings on the shaft and these can be affixed to the front of the motion plate. The assembly should be able to be fitted from the top and bottom of a running chassis. The parts could be glued together and then attached to the insides of the frames using the pump valves and the cranks and eccentrics can rest on top of the axle.
Very difficult to photograph!
£10 a set including UK postage. 


Wednesday, March 17, 2021

7mm Craven Slaughter Standard Goods being developed

 I think many of you know I am designing and making more in 7mm scale nowadays and have been wanting to re-scale the 4mm Craven Slaughter Standard Goods for a while.

Here is a photo of the etches and some of the 3D resin parts for the 7mm version.


There are still a few parts of the 3D designing to do. One major part that I was unhappy with was the dome, safety valves and levers unit. I have now redesigned this to be made up of four parts as follows.


I have just pushed these parts together for a photograph, no glue yet. I am a great deal happier with this aspect now.


So, now for a test build and write the instructions.

I am awaiting some wheels for the loco so will start on the tender and probably publish it on RMWeb with a few shots here also.


Cheers, Ian